- Home
- How to Make Pro Cookies
- Royal Icing Tips/Hacks
Royal Icing Tips and hacks to Stop Frustration and Save Time And Money
This royal icing tips page was written to save you time, frustration, and money. When a product doesn’t turn out right, it takes the jingle out of your pocket.
Problems can occur anywhere from mixing royal icing to mixing colors, sugar cookie icing consistencies, piping, and beyond.
Let’s address some issues so you aren’t wasting time, or money, or having to swallow an exasperation pill.
I have divided this page into 4 easy-to-read sections...
-Royal icing tips when mixing a full batch
-Royal icing tips for mixing colors
-Royal icing tips during and after application on cookie
-Miscellaneous royal icing tips and hacks
***Near the end of the page I’ll give you a link to download all of these royal icing tips and hacks. You can then print and leave it at your workstation to periodically refer to it. Eventually, all of it will become second hand and you won’t have to lay your eyes on it.
Royal icing tips for mixing a full batch
Make sure to get the free download of my Superior Royal Icing. This will assure you are off to a great start!
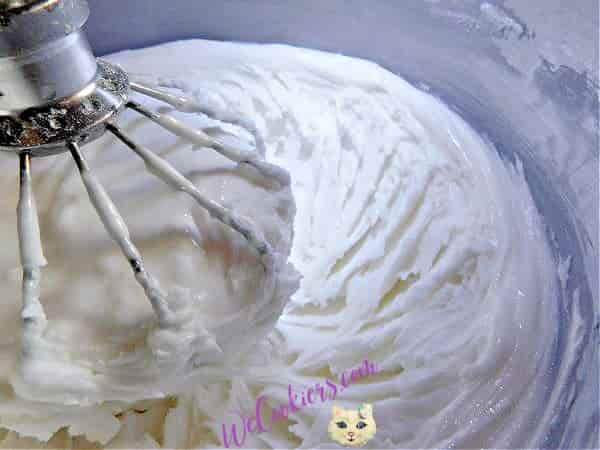 My Superior Royal Icing. Tap the free download link above.
-mix on low only with the whip attachment. When mixing the batch of royal icing, only use the low speed for 8 minutes max. More speed whips air into the icing, causing air bubbles and flattened royal icing on the cookie instead of fluffy
-do not add too much water. Too much water will slow down the drying, thus, increasing the chance of color bleeding.
-use quality powdered sugar. Quality means the brands add less cornstarch. Cornstarch contributes to color bleed.
-add corn syrup to the recipe to help give it a little shine. It won’t give it a huge amount, but it won’t look so much like a matte finish when dried.
For a shinier look when the royal icing is dry, using a food dehydrator does wonders! After I started using a dehydrator, I no longer add corn syrup. There's no need with my Superior Royal Icing recipe.
If you have been wondering about a dehydrator, go to my page, 'Royal Icing Flooding'. There's some great info there for you. I show you the one I have and use daily for cookies. I love it! This page also provides more tips and consistencies for your sugar cookies.
-wipe down with white vinegar anything that will come into contact with the sugar cookie icing, like a bowl, attachment, or spatula. Any oil or grease will make dried royal icing splotchy.
Royal icing tips for mixing colors
-mix colors and let set overnight. This allows the colors to develop and become the true colors. If you mix and use it right away, by the next day it may not match the expectations of the customer.
-do not use liquid colors, only gel, and concentrated powders. Liquid colors have more water. They also result in using more color and making icing taste bad. You won’t get vibrant colors either.
-make sure all colors are of the same consistency. If colors are different consistencies, the more liquid color/s will pull the other colors into it.
-when mixing colors, do not beat and stir, rather fold and use the paddle technique slowly while turning the bowl in your hand. This helps keep down the number of air bubbles and overmixing
*Speaking of techniques, have you seen these Cookie Decorating Techniques?
-for dark and deep colors, using concentrated food powders is recommended. Adding too much gel can change the taste of the icing significantly.
Royal icing tips during and after application on sugar cookies
How to Make Professional Sugar Cookies to sell the cookies takes practice, a lot of time, and skill. Sign up for the WeCookier's Express monthly periodical. I'll show you everything you need to know to begin. After you have the hang of it, I'll help you set up your cookie business too! Click this image to sign up...
-let the flood crust well before applying other colors (goes without saying…color bleed). You can let the base coat dry completely, however, it can pull the other color into it and cause the bleeding. It is suggested to let it crust well instead.
-use a dehydrator to crust before applying colors. Add a color, pop in on the lowest heat for 5-10 minutes then add another color. My sugar cookie recipe I've let stay in a total of an hour and a half (b accident) and there is no drying out of the cookie. This depends on the recipe you use. Typically I go an hour total, at most.
-dry cookies in the oven with the light on overnight. Works like magic! This is how I did it before I got a dehydrator. I quickly ran out of space though and HAD to get one for efficiency's sake.
-freeze colors in advance. Makeup colors in advance to save time. Seal well and freeze for months.
-freeze leftover colors. Freeze leftover colors easily by placing them in very airtight containers or bags. I'll reuse them many times and keep re-freezing them as so many pro cookiers do. I've found beyond 5 or 6 times, that they won't hold shapes like flowers, but they are still good for flooding or piping letters. I hate waste!
Some markers can be prone to color bleed. I wrote an entire page sizing up 7 different brands of Food Color Markers.
*As a side note, if you are using food color markers and want to enhance your sugar cookies more, a visit to this site will teach you how to write in modern calligraphy: Lettering Daily
Here is the download link to get all these tips in a handy read-out! Just click on the image...
Miscellaneous royal icing tips and hacks...the no-nos
-do not use buttercream with royal icing
*Here is the Best Buttercream Frosting recipe I use. Bonus, vanilla and chocolate!
-do not refrigerate decorated cookies with royal icing. Refrigerators hold a steady 65% humidity, which makes royal icing and sugar cookie glaze color bleed and splotch. Make sure to pass this on to your customers too.
*Learn more about my Sugar Cookie Glaze
-try to keep decorated cookies away from humidity. Humidity wreaks havoc with sugar cookie icing by causing color bleed and splotching. Depending on geographic location and the season, some cookier’s use dehumidifiers.
As more royal icing tips and hacks come to mind, I will be adding them to this page. Hope that’s helped!
Top of Royal Icing Tips

