- Home
- Royal Icing Transfers
- Royal Icing Transfer Sheets
Royal Icing Transfer Sheets... essential
tips for perfect results.
Royal icing transfer sheets are an absolute must for decorating sugar cookies. Why?
-money saver
-time saver
-adds dimension to cookies
-removes fear of color bleed
This is a quick hack video when you are doing royal icing transfer sheets. More on this down the page.
Update:
This page was written before I developed a new and easier way. This works great. But, if you have a dehydrator, just pop them in for an hour on high. Let them come to room temperature (just a couple of minutes), and they are ready to use.
My preferred way is piping them on the flimsy plastic protector sheets for paper. Yes, I place the wet transfers ON the plastic sheet protectors into the dehydrator. They usually will slide right off.
Here is the link to my Royal Icing Transfers page. It’s loaded with information on what they are, how to use them, and why you need them as a cookie artist.
The transfer sheets, some call templates, can save you money by making your decorations. They save time by having them pre-made so you can open your air-tight container and grab them quickly. Yes, it takes a little time to pipe them, but you still can save a substantial amount of time later.
The beauty in using these templates is that they can be used for buttercream or piped chocolate as well. When using buttercream frosting, just place the piped transfers in the freezer until completely frozen. You will need to work relatively fast or the buttercream will melt with the heat of your hands. Here is the Best Buttercream Frosting recipe I love!
Let’s move into the nitty-gritty of using royal icing transfer sheets.

Royal Icing Transfer Sheets…Plastic, Wax, or Parchment Paper + Removal
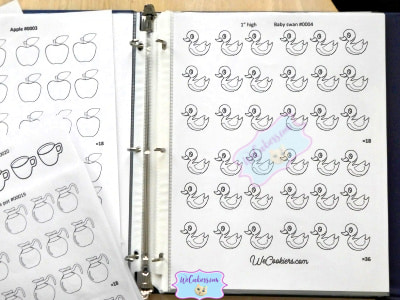
The best thing I have found and works like a charm every time, are clear sheet protectors. I just use the cheapest ones from Amazon like those below. the kind that has holes to place them in a notebook. They are great for placing the printed-off pages and sticking them in the sleeve and then in the notebook, alphabetically, so they’ll always be ready for you.
This is a great 5-star company. Also, the more you order, the cheaper they get!
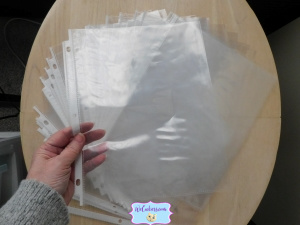
- 100-pack of clear sheet protectors 8.5 x 11-inch sheets of paper, each pocket can hold up to 10-15 sheets of paper.
- Top-loading pocket for easy insertion and removal.
***Hold the phone! I'm always looking for new and easier ways to do things.
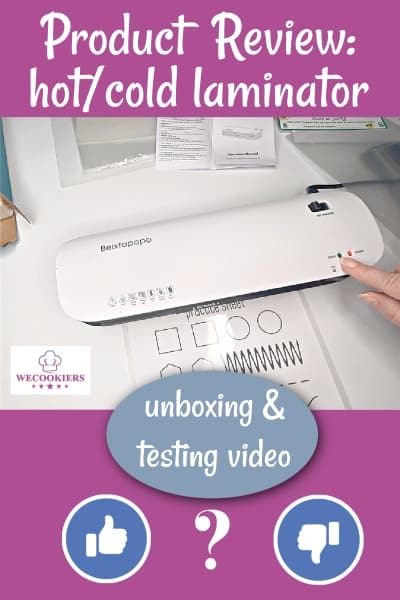
A few months ago I purchased a hot/cold laminator for my cookie classes. I love this machine so much!
I now make my royal icing transfer sheets by laminating them. This way they can be submerged in water and dried easily. Time-saver and handier = WIN! Here is the one I bought...
- 8.5x11 thermal laminator machine
- suitable for all A4/A5/A6 size paper/photos
- hot and cold dual-function
- 1-click jam release button
- great customer support
The template sheets I make will show you how many you pipe so you don’t have to keep counting back.
Sweetness overload! Here's the baby swan template:
Okay, so you have piped on the sheets and the transfers are
drying. Looking ahead, how do you remove them from the plastic sleeve?
Other cookiers say to pull down the paper off the edge of the table to help release the shapes. I never found this helpful for me. They would still break. I feel like I came up with the perfect way! How?
I had 8 dozen eagle scout cookies to do. I decided on transfers for the eagles so they could be done well before baking the cookies and flooding them.
I knew I would have to come up with an idea to counteract breakage problems. I did!
Taking a spongy item, like a mousepad, which is indeed what I use, I put it flat on the table. I then place the sheet of transfers on it. Taking a palette knife (it’s the thinnest item I could find), I line the bottom of the shape up with the bottom of the mousepad. Taking the palette knife, I slide it under the transfer while pushing down firmly on the pad. It’s kind of spongy so it allows this perfectly. Presto! It comes off smoothly.
Just below is a video I made of the process. Sorry for the quality of the video. It was taken in the middle of the night. You know the feeling, I’m sure!
I needed 96 so I piped 120 eagles to be safe (I had hoped).
I only had 5 eagles break in various places, mostly the heads. If you notice, the heads were just outlined, not filled inside it. Also, remember above I said it’s probably best not to pipe fine lines? I figured the heads would break, but piped them on the transfer anyhow. I got lucky with those. But I did use a food color marker and just draw on its legs and claws.
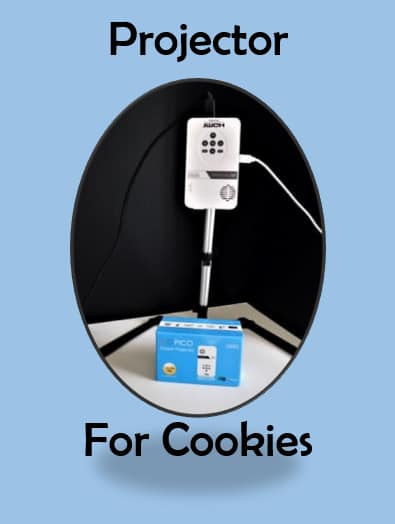
For the red lines, I used one of my faithful and trustworthy friends. Meet the PICO + projector for cookies:
- 3x Brighter
- Ultra Portable with Battery
- Wireless Smartphone Connection
- Multi-input Interface
- Includes mini-HDMI Cable
- Cookie Decorating...You get the most detail for your designs
Royal Icing Transfer Sheets…tips to make the perfect shapes.
Here's a of tip:
-use a royal icing transfer sheet with circles to pipe for PYO cookie palettes. When the circles are dry paint them with a mixture of gel food color and vodka or the like.
-make sure to use fresh royal icing (give mine a go, it’s the BEST)
*I found a wonderful glaze recipe online. I made it into a download for you. I have used it several times and it seems to work just like royal icing but does not do so great with piping stiff things like flowers. Since royal icing is quite expensive to make, glaze could be a good stand-by in these times.
-the consistency should be of toothpaste or mashed potatoes
-let transfers dry for 24 hours to 5 days (totally depends on humidity)
-use a dehydrator for on high for an hour, if you have. After they come to room temp they are ready.
*If you are wondering which dehydrator I have, you can click to view my page and why I love it here---> Royal Icing Flooding
-or use your oven with the light on overnight
-for fine lines, don’t pipe them with the transfer, pipe them after the transfer is added to the cookie (this way you don’t have to worry about them breaking off.
-do NOT add food color marker details until you add the transfer to the cookie or it WILL bleed! By the way, grab the best-ever sugar cookie recipe that I use.
-after drying them well, place them in a good airtight container, single layer, with parchment or waxed paper between the layers of tranfers
-do not add royal icing transfers that are different colors into the same container. The colors will bleed into each other
-keep them away from humidity
These babies last a good long while, even up to a year!
Wondering how to prevent royal icing from bleeding on a cookie? Learn from all of the knowledge I've gathered through the years. I wrote this informative page on all the tricks and hacks. I even made a free download you can pin by your workstation. Grab it here Royal Icing Flooding. Scroll half way down to the download image.
Royal Icing Transfer Sheets…how to clean them
After you have removed and stored the transfers, you’ll be left with some dry residue from the icing on the sleeves. I wish all cleanup was this easy!
Simply take a wet paper towel or dishcloth and wipe it off. Surprisingly, it wipes off quite easily.
*Update: if you decide to go the route of using laminated sheets, toss them in a sink of water.
When I use royal icing transfer sheets, I will pipe lots of pages of different designs. Therefore, I’ll have something like twenty sheets to wipe off. When I do this, I spread out all the sheets after wiping them and let them sit there to air dry for a bit. I then slip the paper templates back in and snap them into my notebook. So fast and easy!
Royal icing transfer sheets…how much are they and where to
purchase them
Royal icing transfers will help your delightful cookies take on status of professional.
Fortunately, digital downloads for the transfer sheets are economical and worth every little penny. You can normally find them between $1.25-$1.75 for each page. Many times, people sell them in a 3-pack, meaning the same design in 3 sizes. Some in sets, like my fall set.
Ordering in packs is good. Since the price is pretty nominal, one size may not be the right size for your needs, so you can choose in your pack.
Shape ideas are endless.
If you are thinking of making your own royal icing transfer sheets, have a look at this site, FreeIMG.net for shapes. It is free public domain images.
As addictive as decorating cookies, so are piping on royal icing transfer sheets. They easily showcase your cookies as being professional. Your customers will adore them.
Link to Royal Icing Transfers
Top of Royal Icing Transfer Sheets, to the top
View these popular pages too:
